Configuring NuttX
Apache NuttX is a very configurable operating system. Nearly all features can be configured in or out of the system. This makes it possible to compile a build tailored for your hardware and application. It also makes configuring the system complex at times.
There is a configuration system that can be used on the commandline or in a GUI. I’ve found
the easiest way to configured Apache NuttX is to use the menuconfig system. This is used
via a terminal program and allows quick access to all of Apache NuttX’s features via a system of
menus.
The Apache NuttX configuration system uses Linux’s kconfig system adapted for use with Apache NuttX. Here’s info on Linux’s kconfig menuconfig system.
After you’ve configured your board (see Compiling NuttX), you can use the menuconfig system to change the configuration. Once you’ve configured, you can compile to make a build that has your configuration options selected.
Initialize Board Configuration
Here we’ll use the simulator since that’s the simplest to explain. You can do this with any board and base configuration. Note here you should be supplying configure.sh the correct flag for your build environment:
-l selects the Linux (l) host environment.
-m selects the macOS (m) host environment.
-c selects the Windows host and Cygwin (c) environment.
-u selects the Windows host and Ubuntu under Windows 10 (u) environment.
-g selects the Windows host and MinGW/MSYS environment.
-n selects the Windows host and Windows native (n) environment.
Select the simulator configuration for a Linux host:
$ cd nuttx
$ make distclean  # make a clean start, clearing out old configurations
$ ./tools/configure.sh -l jupiter-nano:sdmmc-nsh-net-resolvconf
  Copy files
  Select CONFIG_HOST_LINUX=y
  Refreshing...
Make
$ make clean; makeNow you should have NuttX binaries– one suitable for loading via a JTAG hardware debugger (called
nuttx) and one suitable for loading via the U-Boot bootloader (callednuttx.bin).Installing
If you are not using a JTAG debugger, you can take the Micro SD card, plug it into a reader connected to you computer, and copy it onto the card, replacing the already-existing
nuttx.binfile. If you want to make your own new bootable disk, you need follow the instructions at Creating a Bootable NuttX SD Card From Scratch.If you are loading the
nuttx.binvia a JTAG debugger, follow the instructions at any:debugging.Menu Configuration
NuttX has a lot of configuration options– initially it can seem like a bewildering array of them. This is not a full introduction to NuttX Configuration, for that see Configuring in the NuttX documentation. This is an introduction to using it.
Normally, when you start NuttX, you see something that looks like this:
NuttShell (NSH) NuttX-10.1.0
nsh>
We’re going to another line to this, a login message (Message of the Day, or MOTD). From your workstation commandline, do the following:
$ make menuconfig
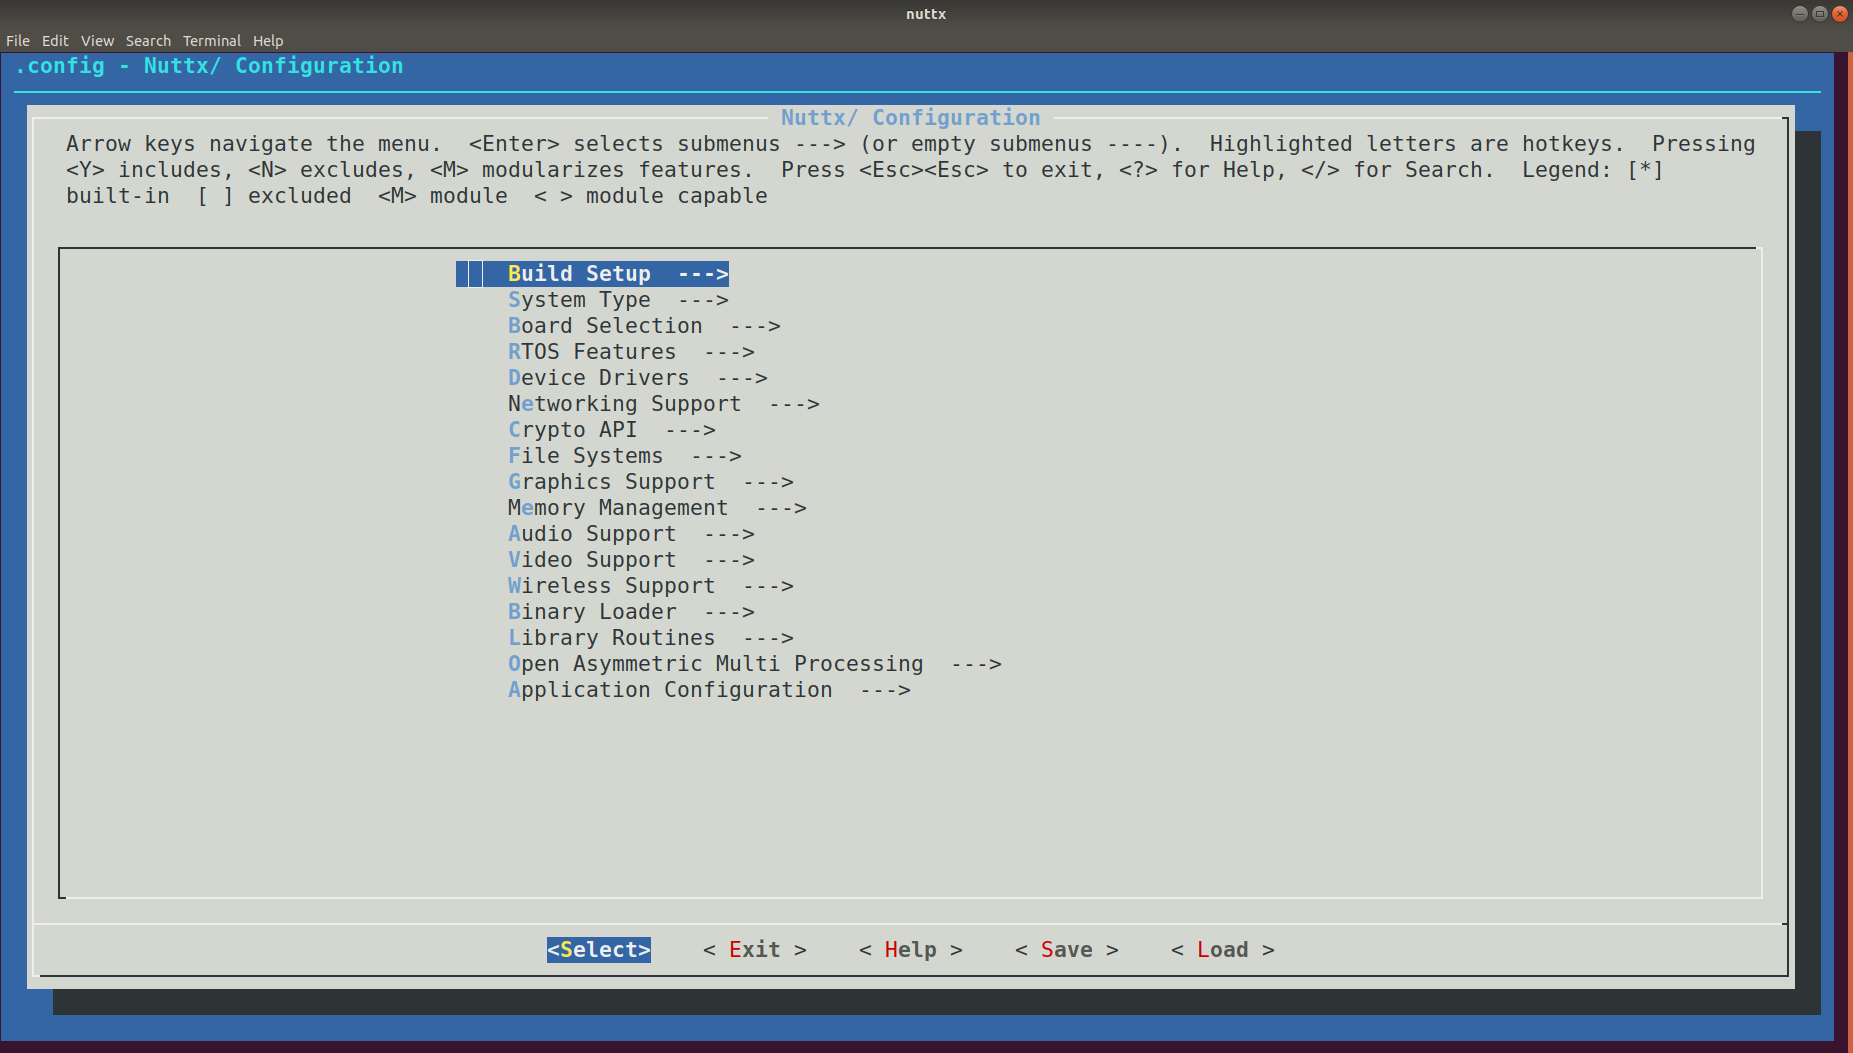
Here’s what you should see:

Application Configuration
The NSH MOTD setting is under
Application Configuration > NSH Library.Use the up and down arrows to navigate to
Application Configuration; hit<return>to select it. Now you’re in theApplication Configurationmenu.Use the arrows to go down to
NSH Libraryand select that. Now navigate down toMessage of the Day (MOTD)and use the spacebar to uncheck that setting (so that it has a blank space instead of a star in it).Now press the return key to enter the MOTD configuration.
Use the arrows to move the selected line down to the item called
MOTD String. Press enter, and enter the following text:Welcome to NuttX on the Jupiter Nano!. Press return to accept the entered text. You will return to the previous screen.Now let’s save. Use the right and left arrow keys to select the
Exitmenu item at the bottom of the screen. Press<return>to select it, Press<return>again, and again, finally pressing<return>in theSave Configurationdialog box that comes up.
Build NuttX with the New Configuration
$ make clean; makeRun
In the gdb window, type
<Control-C>and load the new binary:(gdb) ^C Program received signal SIGTRAP, Trace/breakpoint trap. nx_start () at init/nx_start.c:838 838 up_idle(); (gdb) mon halt (gdb) load nuttx Loading section .text, size 0x46a29 lma 0x20008000 Loading section .ARM.exidx, size 0x8 lma 0x2004ea2c Loading section .data, size 0x2e0 lma 0x2004ea34 Start address 0x20008040, load size 290065 Transfer rate: 76 KB/sec, 14503 bytes/write. (gdb) c Continuing. Breakpoint 1, nsh_main (argc=1, argv=0x20060068) at nsh_main.c:108 108 sched_getparam(0, ¶m); (gdb) c Continuing.
Now, in the NuttX (picocom) window, you should see:
NuttShell (NSH) NuttX-10.1.0
Welcome to NuttX on the Jupiter Nano!
Success!
Next: Debugging NuttX